Sometimes it is difficult as a software engineer to feel connected to our work product. At the end of the day, what can be demonstrated and communicated to others? It is a little easier when developing user interfaces as at least we have something we can show visually. A more cynical view is that all we did today is change some bits in a computer. This is why I like working with wood. I come up with an idea and am rewarded by seeing its physical instantiation.

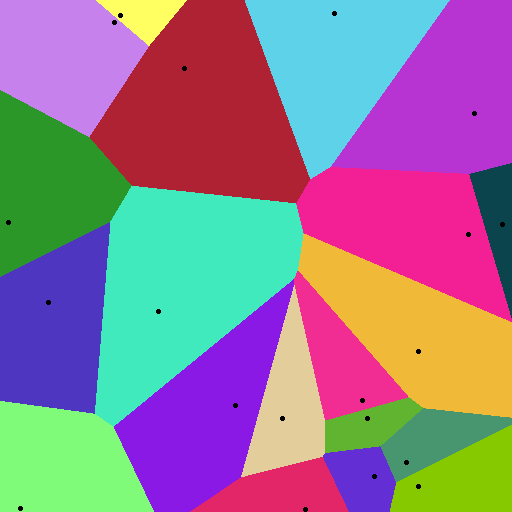
I find that projects that engage both the analytical and creative parts of my brain are especially fun. Last summer I started making some custom wooden parts based on Voronoi Diagrams (at left).
First, a number of seed points are generated. Then the space is divided into Voronoi regions, which are sets of points closest to a seed point than any other. Typically, each region has a randomly generated color. The black dots in the image indicate the location of the seed points.
First, we will create a small helper class that will encapsulate a point’s position and help us calculate the distance to a given pixel.
1 2 3 4 5 6 7 8 9 10 11 12 13 14 15 16 17 18 | |
I’ve added a class factory method that returns new random Points. This will help us later when we generate seed points.
Let’s take a look at the main part of the Voronoi Diagram generation algorithm:
1 2 3 4 5 6 7 8 9 10 11 12 13 14 15 16 17 18 19 20 21 22 23 24 25 26 27 28 29 30 31 32 33 34 35 36 | |
The width, height and sites are parameters to the Voronoi diagram. They determine the width and height of the image as well as the number of seed points.
It should be noted that this code is particularly inefficient; it is written more for clarity than for speed. Several efficient algorithms exist. One of the best known is Fortune’s algorithm and runs in O(n log n) time. Several open source implementations are available online.
We use Chunky PNG to help us create the PNG output file.
Fabricated Wooden Boards
 The first wall art piece is fabricated from ½” thick cherry and paduak
Vector files are required to import designs into my CAD / CAM software. I used Raymond Hill’s Javascript Voronoi library, Raphaël and Raphaël Export to generate SVG files. Two software tools were used to massage the geometry into something that could be machined: Autodesk’s AutoCAD® and Vectric’s Aspire®. The parts had to be machined precisely on a CNC router so that they could be nested and glued together as portrayed in the images below.
 The second cutting board is fabricated from ½” thick cherry and carbonized bamboo plywood